Rehabilitating Ankle Sprains
Richard Sandor, MD
Scott Brone, PT, CSCS
William O. Roberts, MD
Department Editor
THE PHYSICIAN AND SPORTSMEDICINE - VOL 30 - NO. 8 - AUGUST 2002
Ankle sprains are very common, accounting for 20% to 40% of all sports-related injuries. [1, 2] These injuries are known to recur often and create prolonged disability. [2, 3] Ankle sprains are classified into grades 1, 2, 3, which generally correspond to mild, moderate, or severe. They are also classified into three anatomic types: lateral, medial, and syndesmosis. This protocol focuses on lateral sprains of all grades.
The treatment of choice for lateral ankle sprains has evolved from cast immobilization and possible surgery to early and active ankle mobilization. [4] Once a qualified healthcare professional has made the correct diagnosis, early-mobilization protocols can help the patient return to activity significantly sooner than with immobilization. [5] Mobilization and rehabilitation of grades 1 and 2 sprains have generally been divided into three phases. Phase 1 rehabilitation is rest, ice, compression, and elevation (RICE) and protected weight bearing as needed. Phase 2 consists of restoring ankle motion, strength, and proprioception and can begin when the patient can place some weight on the ankle (see the exercises below). Phase 3 includes activity-specific drills before return to full activity.
Rehabilitation Exercises
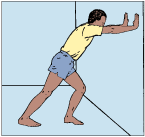
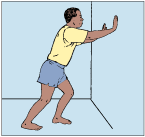
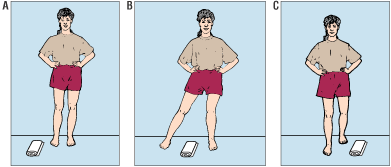
Specific exercises (figures 1 through 10) are done in phase-2 rehabilitation and are designed for easy home use. (The "alphabets" can be started in phase 1 rehabilitation.) The exercises are intended both for recreational athletes and nonathletes, who have neither the time nor the inclination for more intensive supervised rehabilitation. Competitive athletes would probably be better served by a formal physical therapy evaluation and treatment plan incorporating more intensive strengthening and proprioceptive exercises with equipment that is usually unavailable for home use. Exercise bands are available from supply houses (eg, North Coast Medical, 1-800-821-9319).
The exercise protocol. Patients begin with the first 2 exercises in group 1, and add exercises until they can do all in group 1 with little pain. Then they add 2 exercises in group 2 but continue to do the windshield wiper (figure 1) and exercise band eversion and inversion (figure 5). Once patients can do group 2 exercises, they can progress to group 3 but should continue to do exercise band eversion and inversion (figure 5) and the full-weight-bearing single-leg stand (figure 8).
The movements should be done slowly and controlled to reap the full benefits. Patients are encouraged to discontinue using crutches or canes as soon as pain will allow. Walking is permitted to the limits of pain. Once group 3 exercises can be completed comfortably, patients may progress to a light jog on a treadmill or level ground for 10 to 20 minutes. The next phase of rehabilitation is agility drills and sport-specific drills that should be guided by a healthcare professional.
The exercises. For each exercise patients do two sets of 10 to 15 repetitions two to three times a day.
Gauging recovery. Recovery following an ankle sprain is highly variable. Some patients can progress from injury to completion of group 3 exercises in as little as a week, while others take 6 weeks or longer. If any of the exercises increase pain or swelling, patients should discontinue that exercise. If patients have no improvement after 1 week, they should return to their physicians for further evaluation or perhaps structured physical therapy.


